
"That's No Moon" Piñata
The takedown of the Death Star by the Jedi.
When my longtime friend Sarah asked if I could create a Death Star piñata for her daughter’s upcoming Star Wars–themed birthday party, I didn’t hesitate. Of course I would! It had been a while since I’d made a piñata, but this one felt totally doable—and way too fun to pass up.
I started by browsing Pinterest for inspiration and found a simplified version of the Death Star that felt just right. I didn’t want to get lost in tiny, intricate details, but I still wanted it to be instantly recognizable. The goal was something bold and clean that would read “Death Star” the second you saw it.
Next came figuring out the size. I didn’t want it too small to make an impact, but I also didn’t want to wrestle with something massive. After some trial and error, I found a balloon that inflated to the perfect sphere. I blew it up to just the right size and got to work.
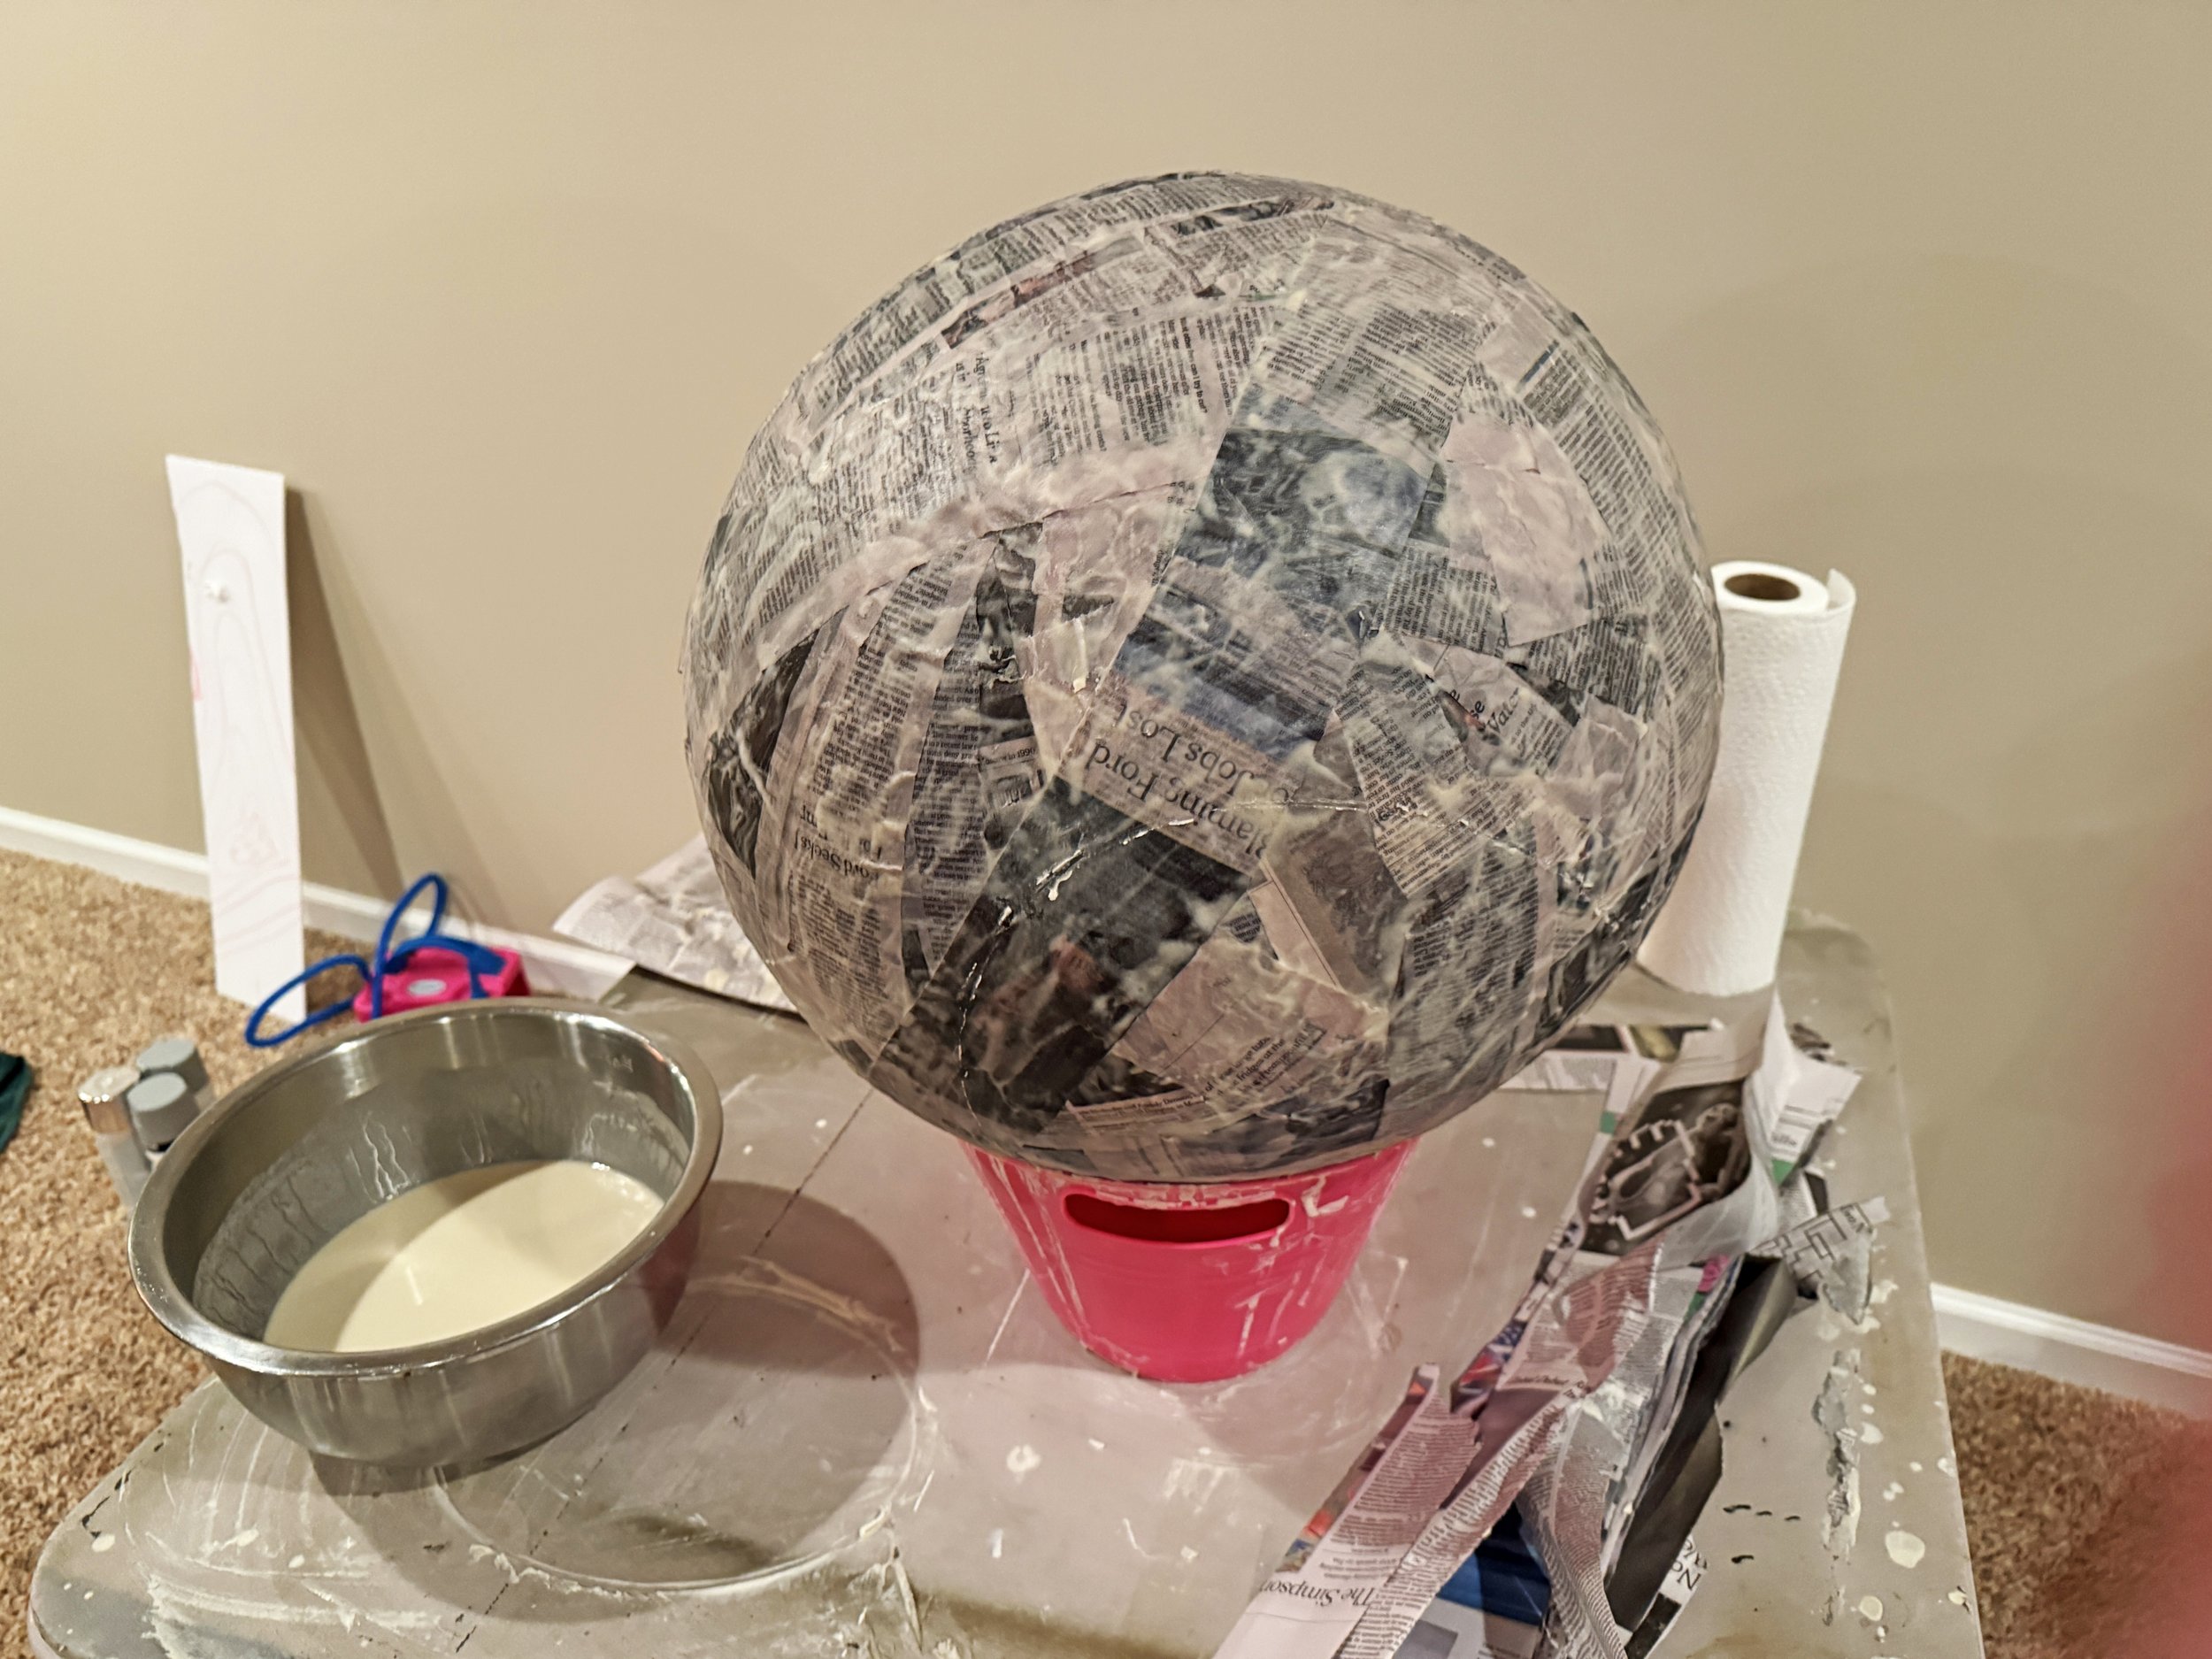
Adding 3 layers of paper mache.
For the messy part, I grabbed a newspaper and mixed up a classic flour-and-warm-water paste. I lost count after about ten batches throughout the process. Strip by strip, layer by layer, the balloon slowly transformed into a solid sphere. To help speed things up, I aimed a space heater at it between layers—impatience is part of the creative process, right?
Once the papier-mâché had fully hardened, I hung the sphere in our garage for paint. We spray-painted the base coat first, and my daughter eagerly jumped in to help. Watching her get involved made the whole project even more special.
After the base coat dried, I carefully deflated and removed the balloon. I measured out the center line and sketched guide marks with a Sharpie to map out the iconic details. Then came the darker paint layer, followed by my favorite part—the detailing. Adding the tiny windows, panels, and lights is what truly brought it to life. I even cut out the primary weapon circle, flipped it, glued it into place for dimension, and touched up the paint so it blended seamlessly.
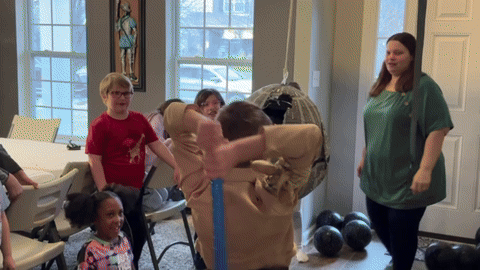
To finish it off, I added a simple ribbon flourish to the bottom and delivered the fully operational battle station. Sarah filled it with candy through the “thermal exhaust port” I cut into the back, and the kids had an absolute blast taking it down.
All in all, it was another creative adventure—and a reminder that sometimes the most fun projects start with a simple, “Of course I will.”
– The Media Buff
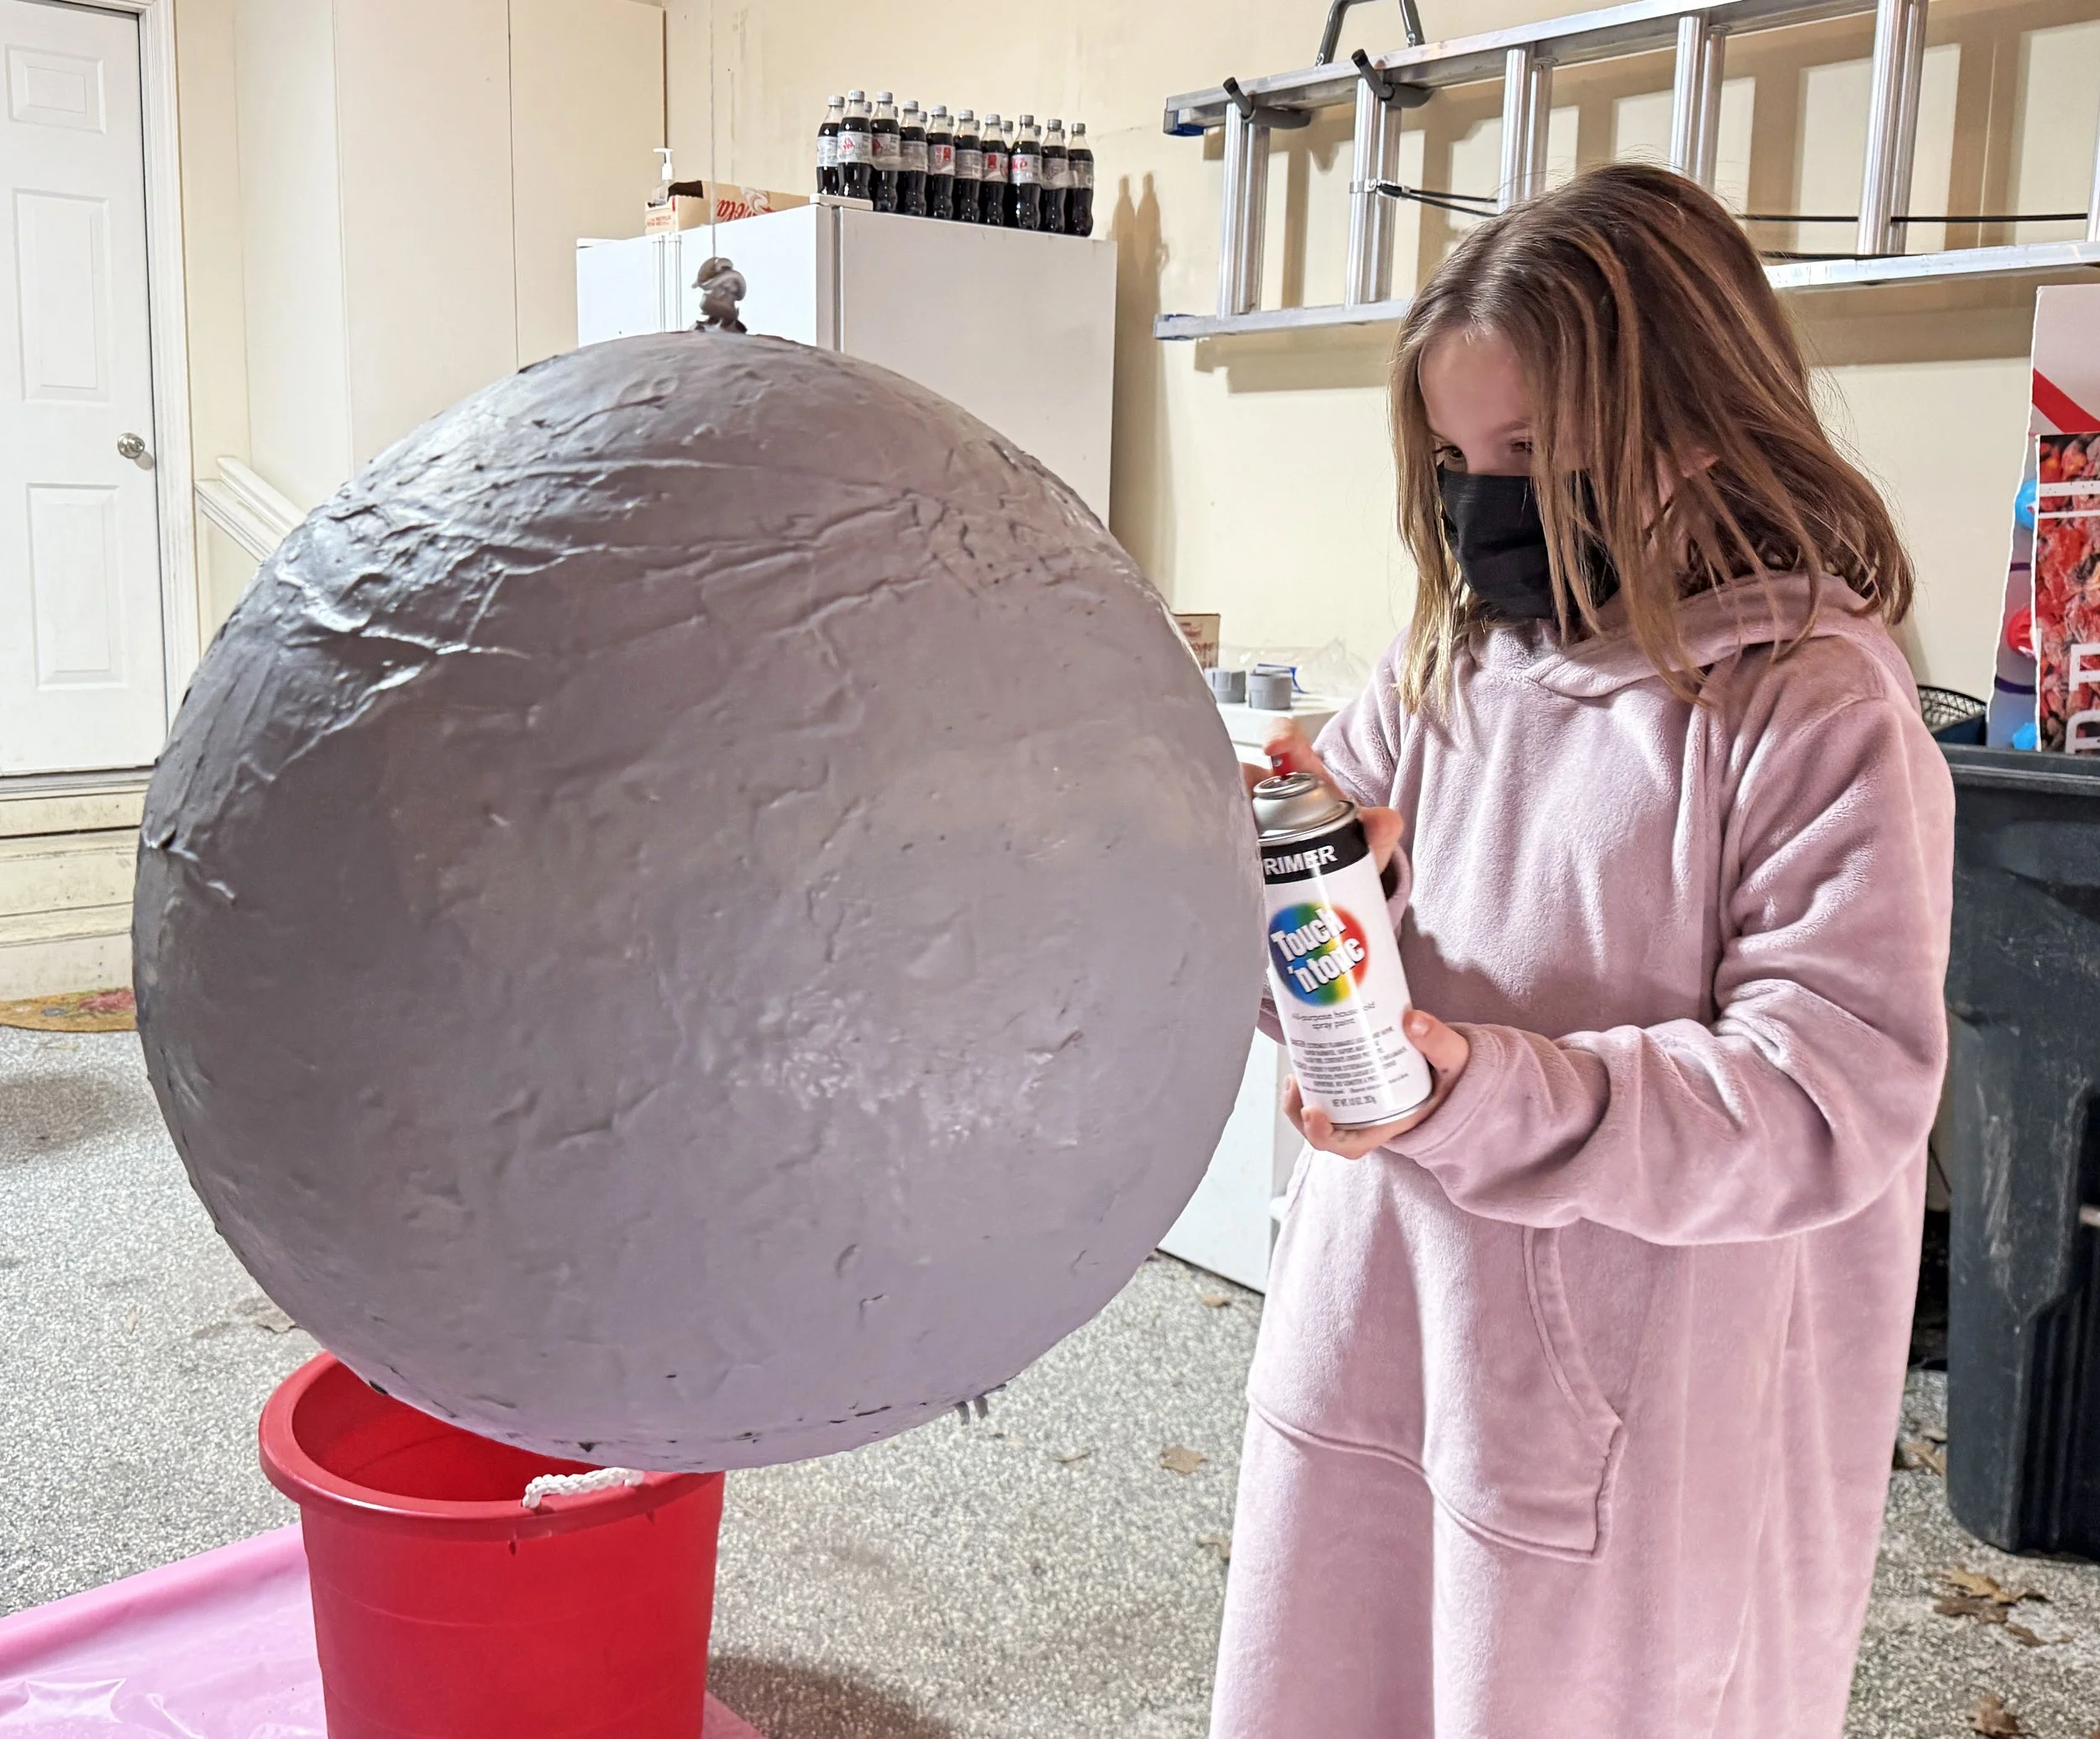
My little one helping spray paint the globe.
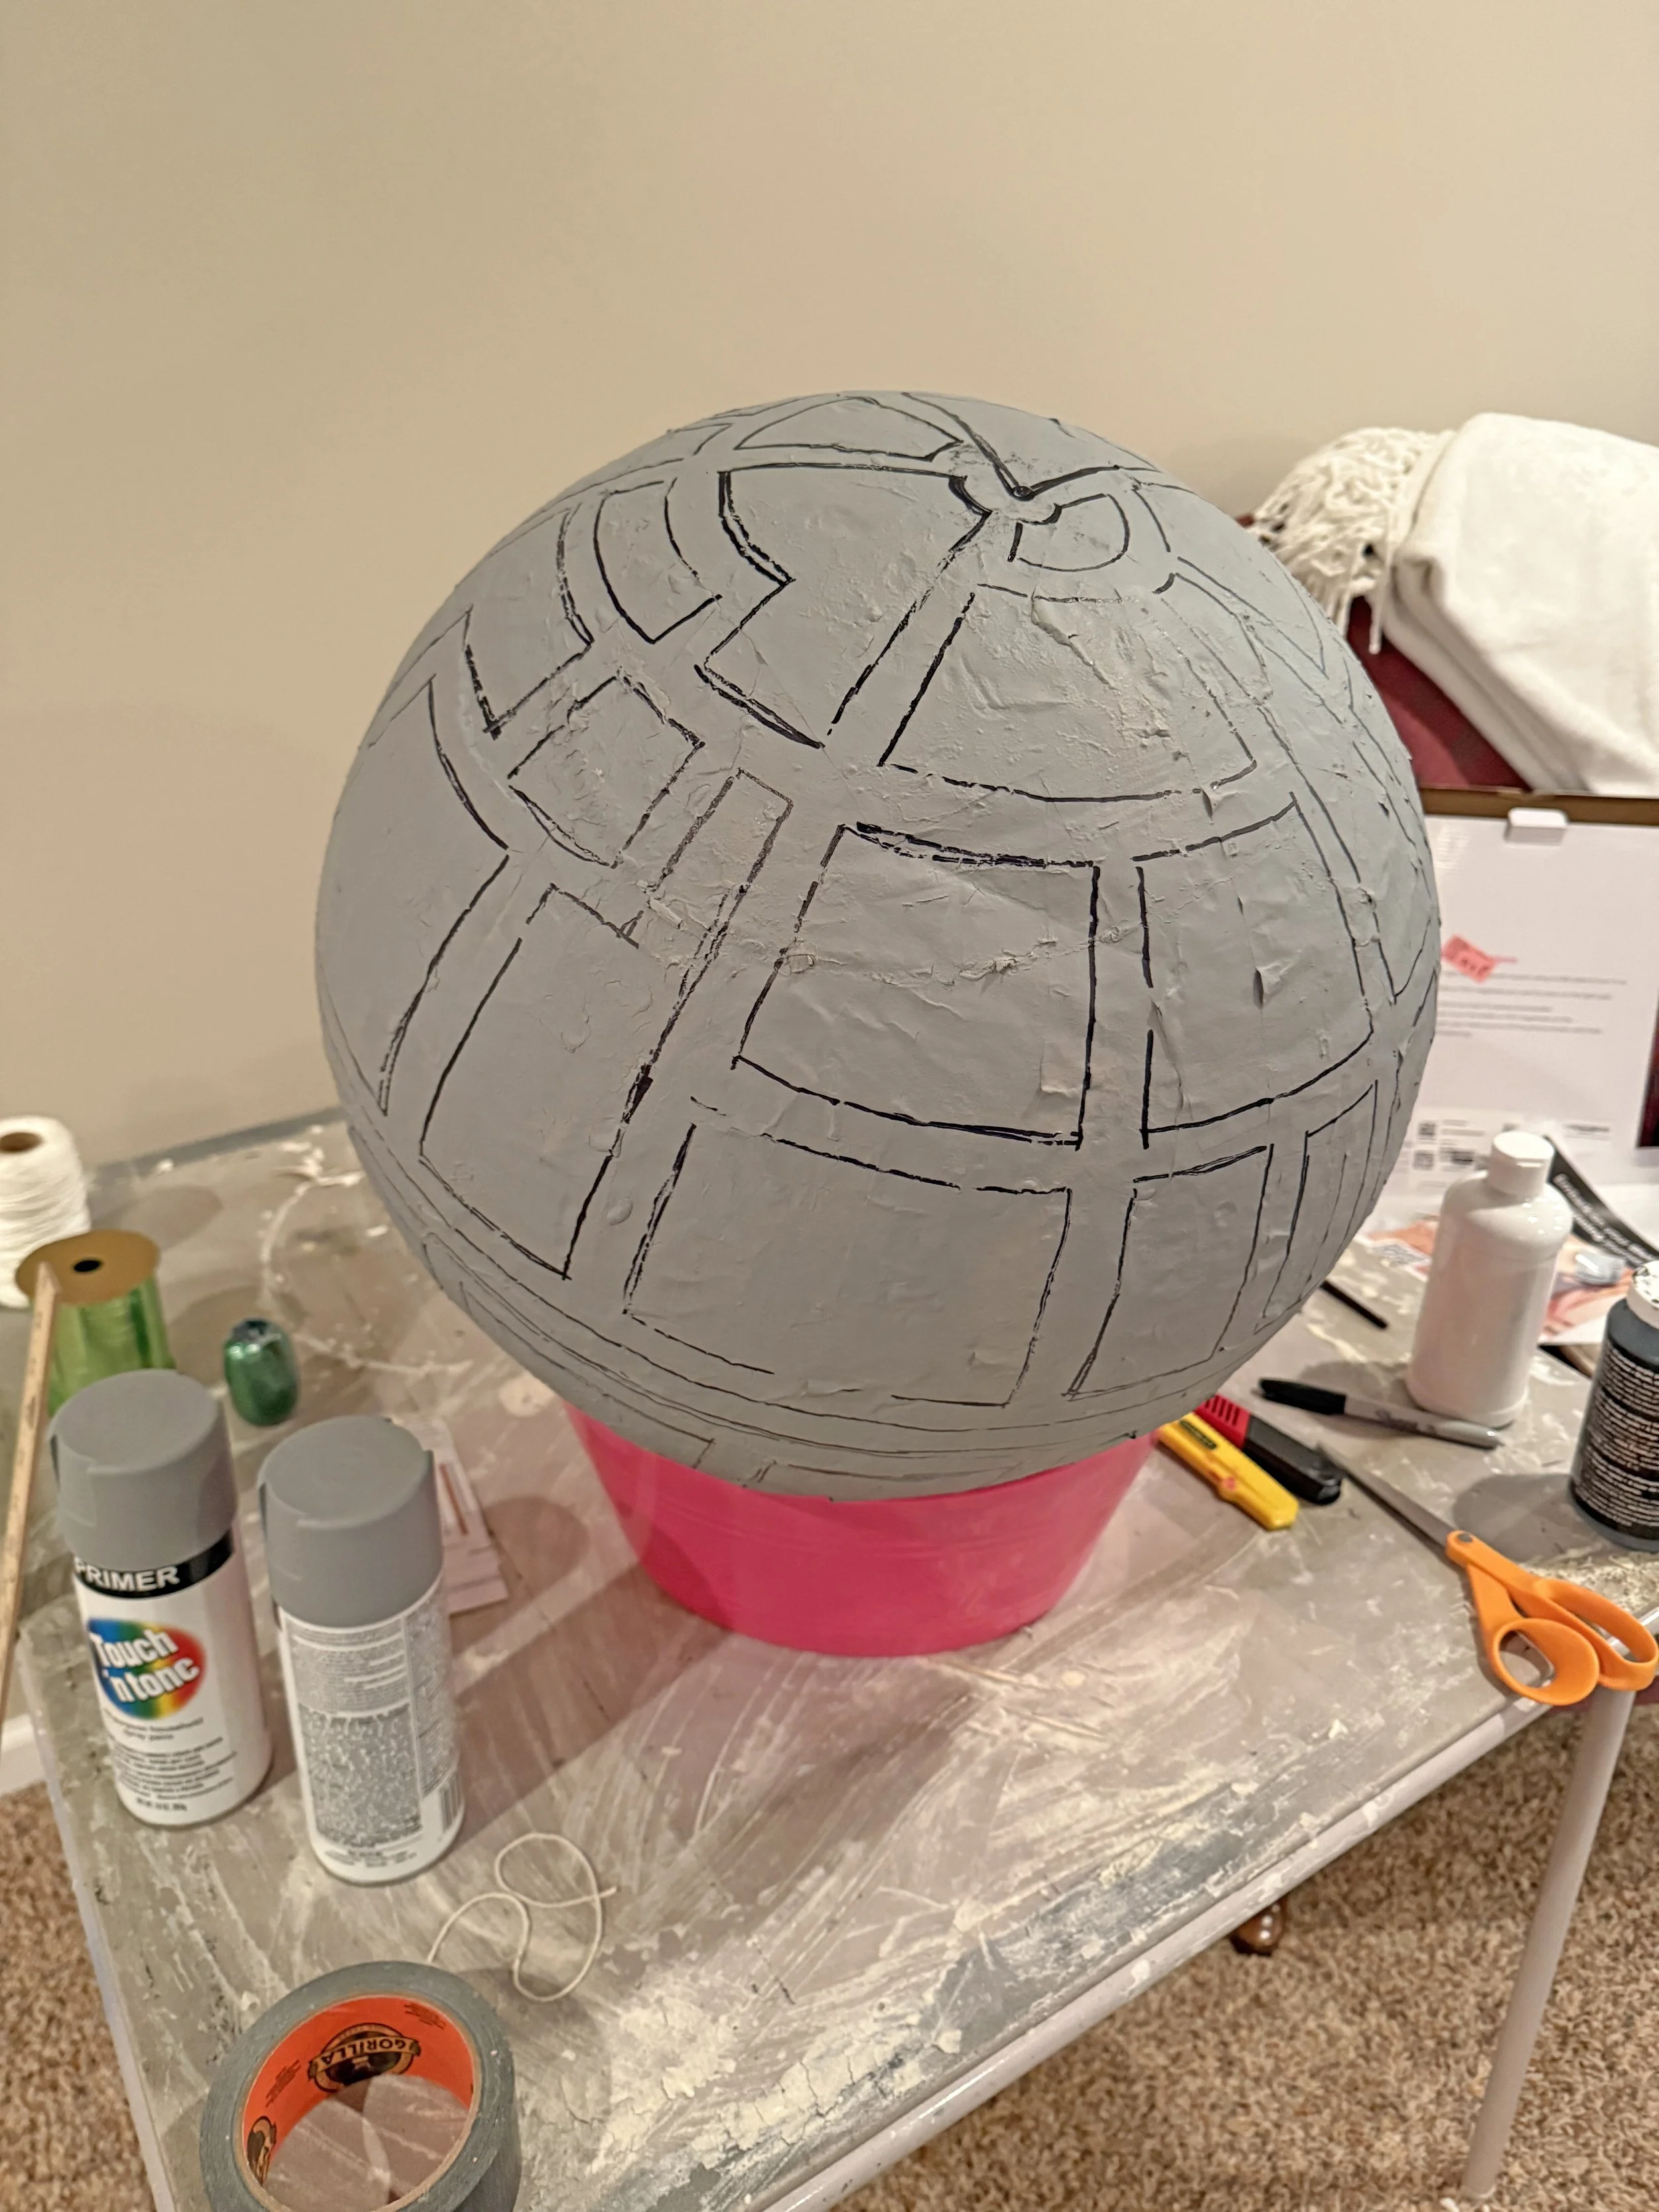
Adding in guides for the paint job.
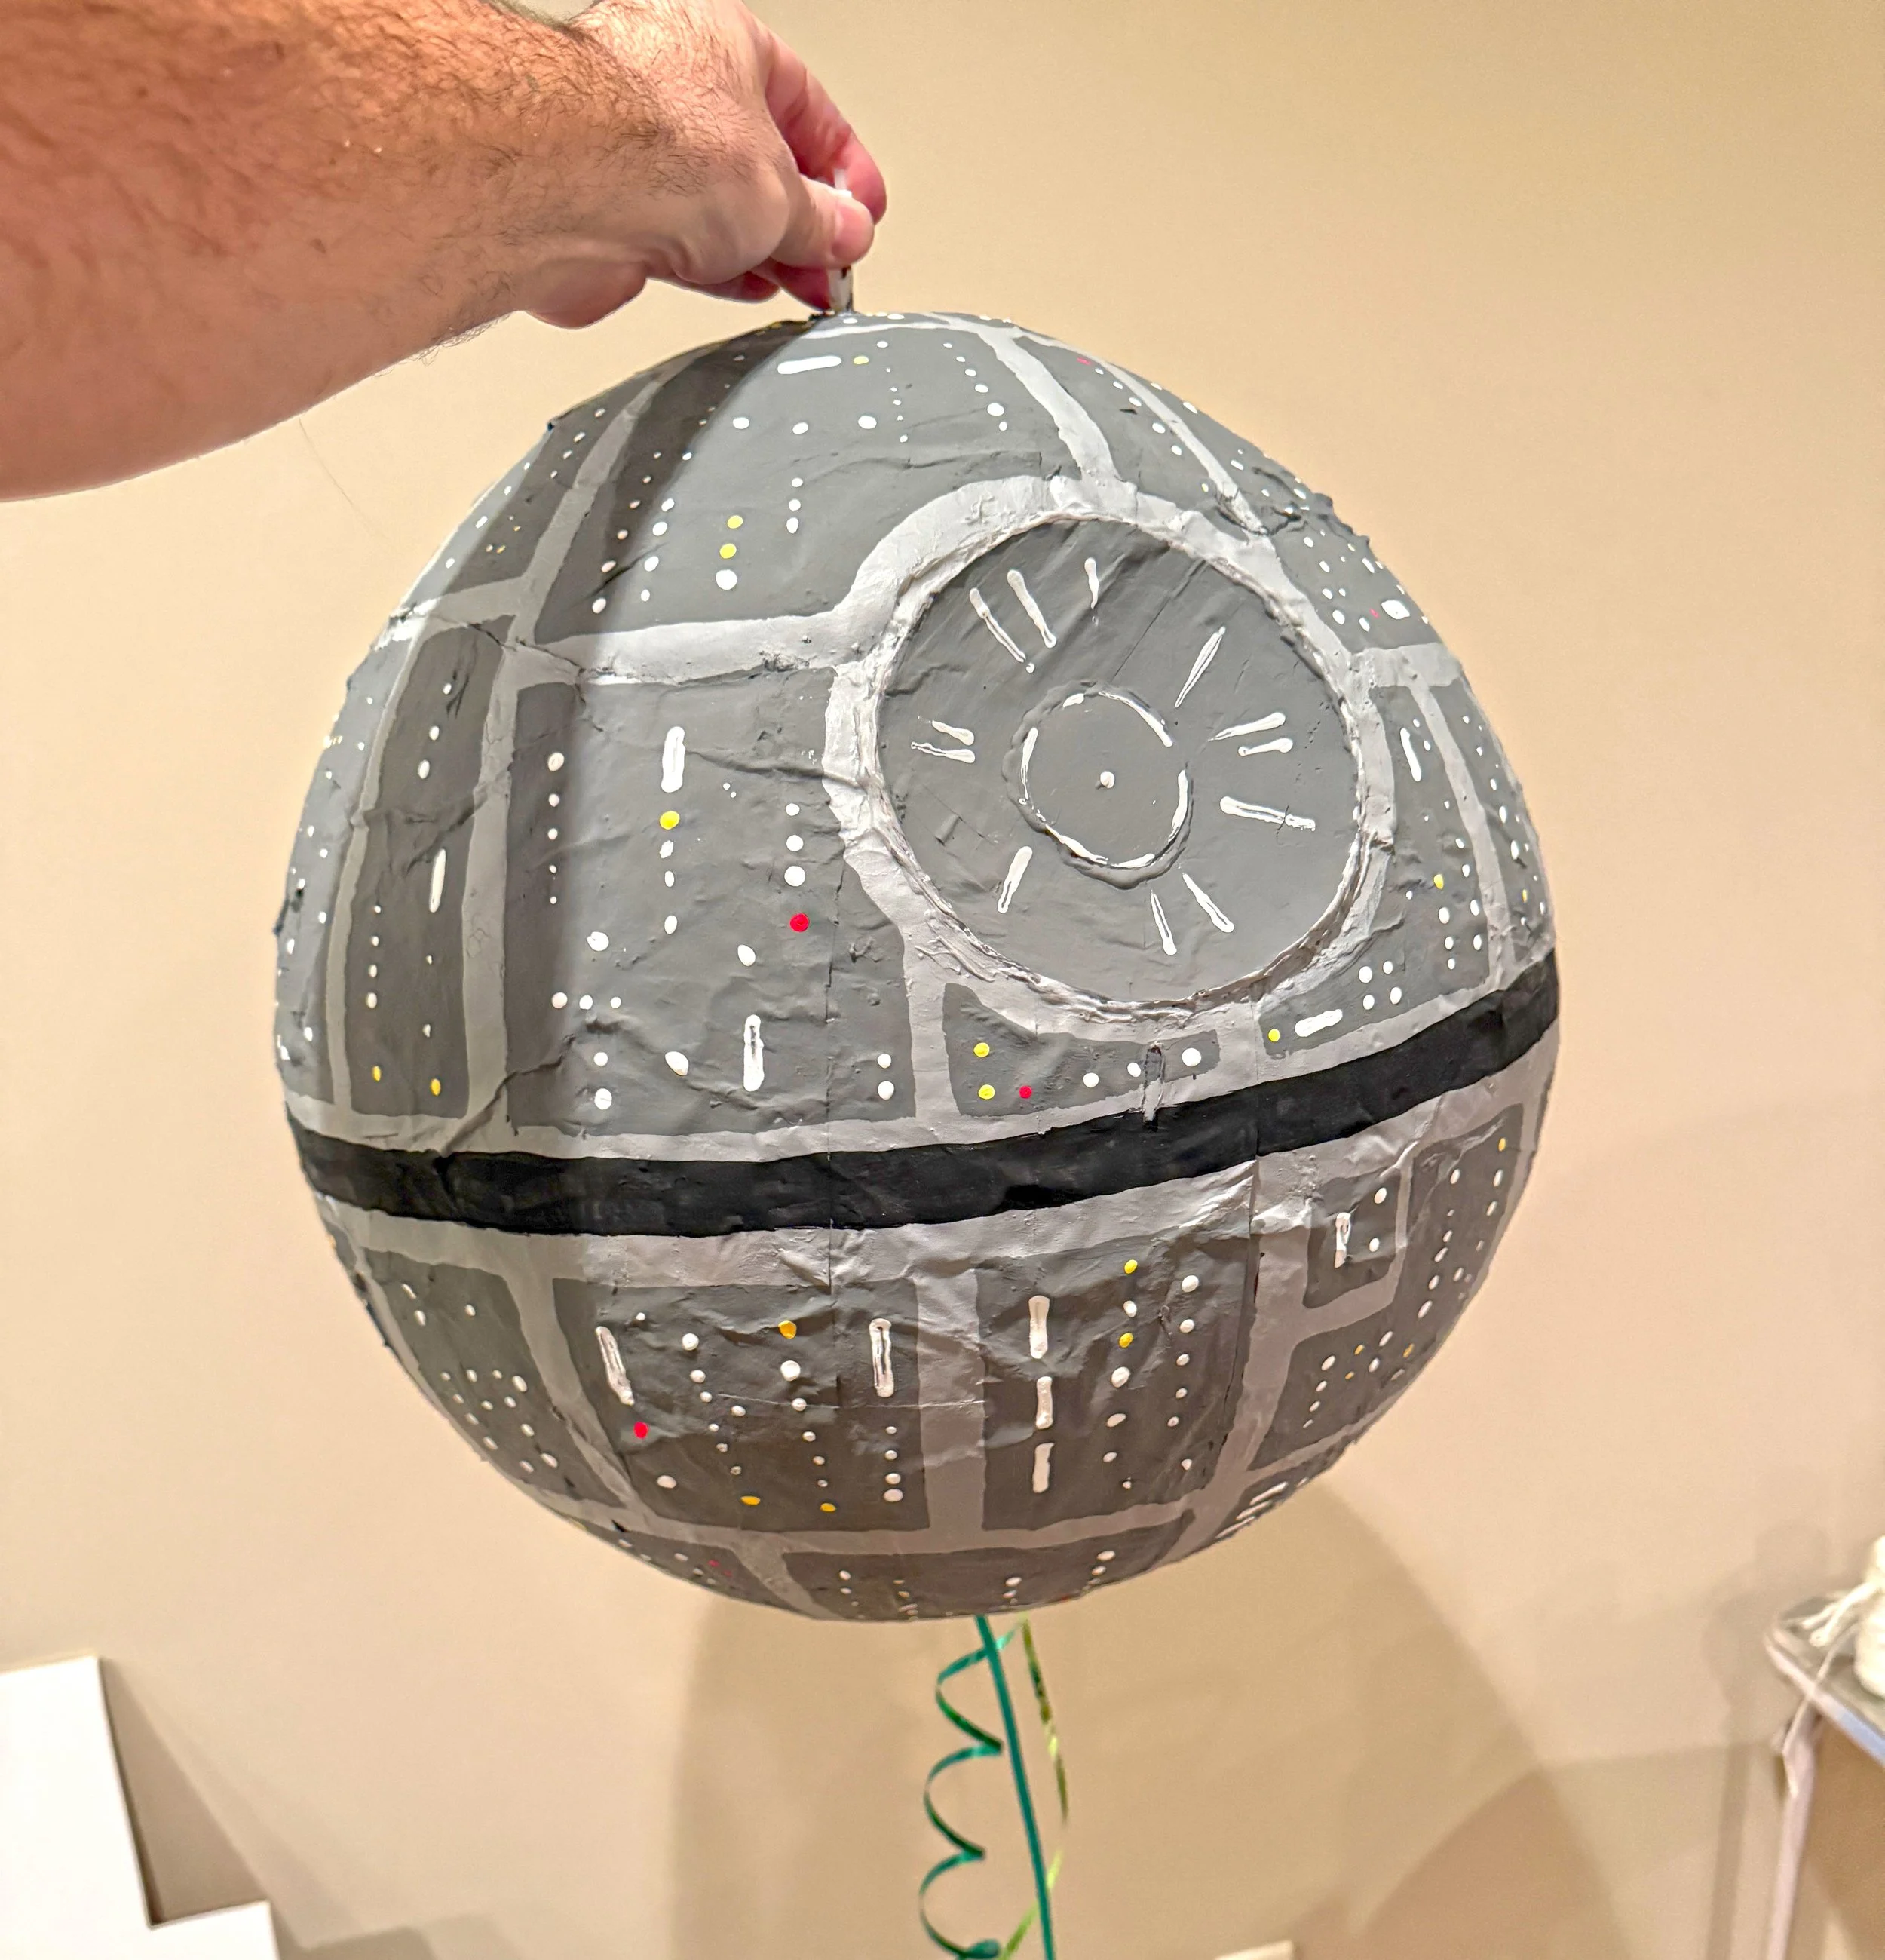
The final product! Just needs candy.
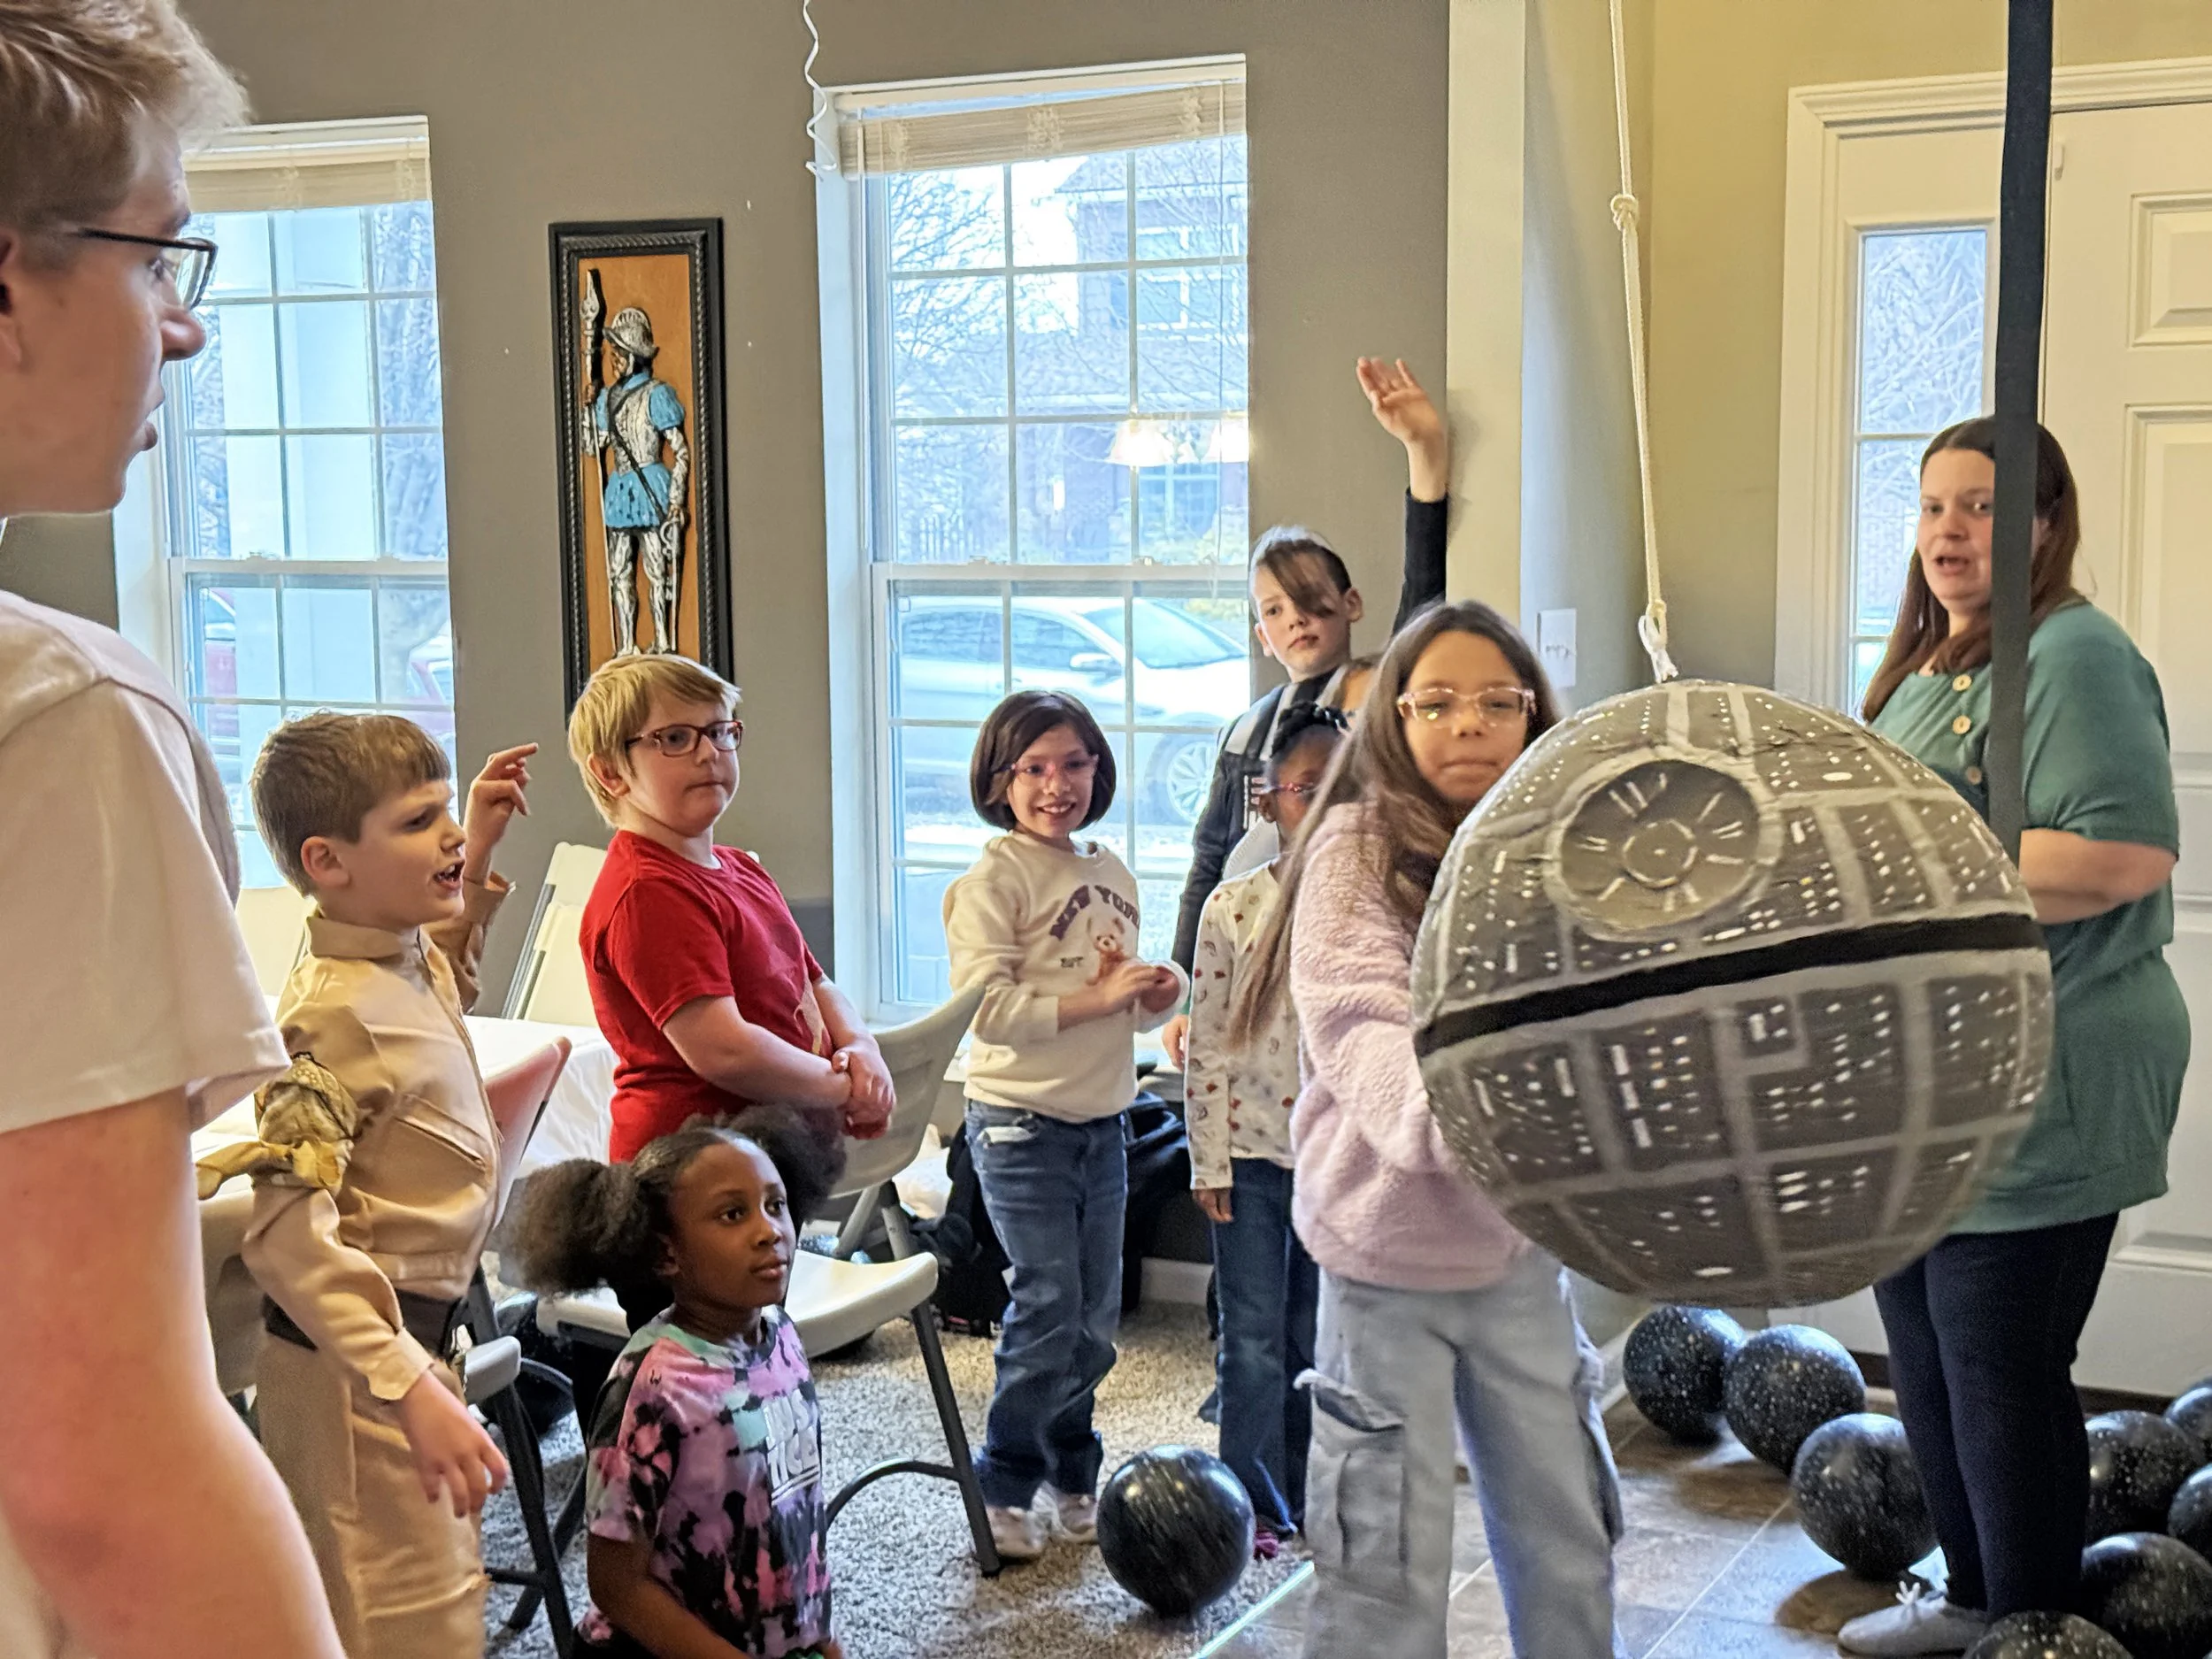
Time for action! "Die, Rebel Scum!"